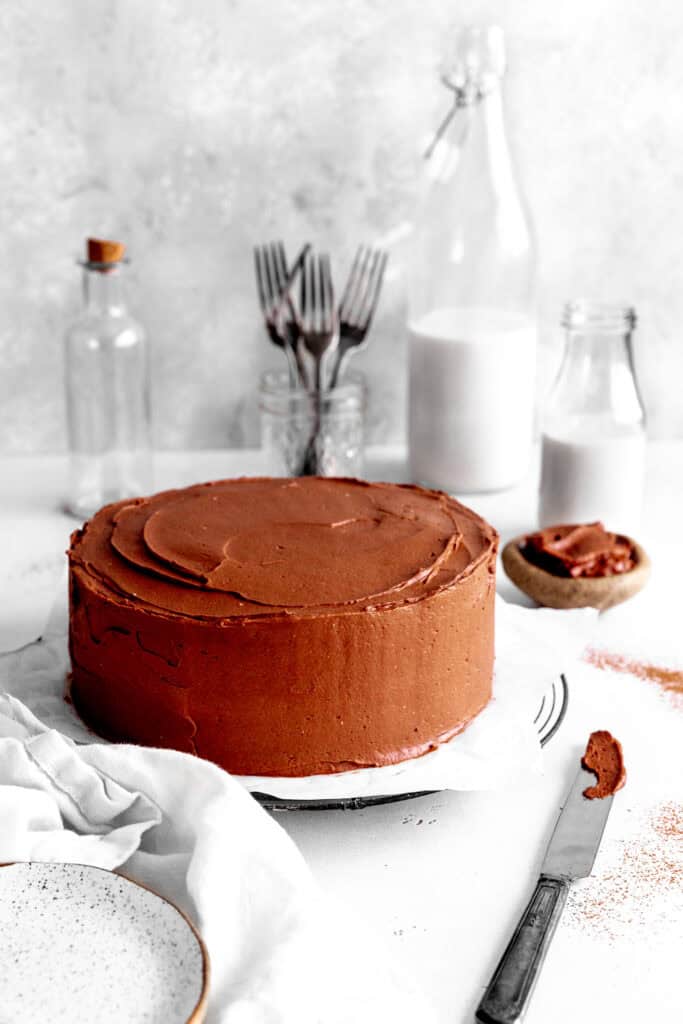
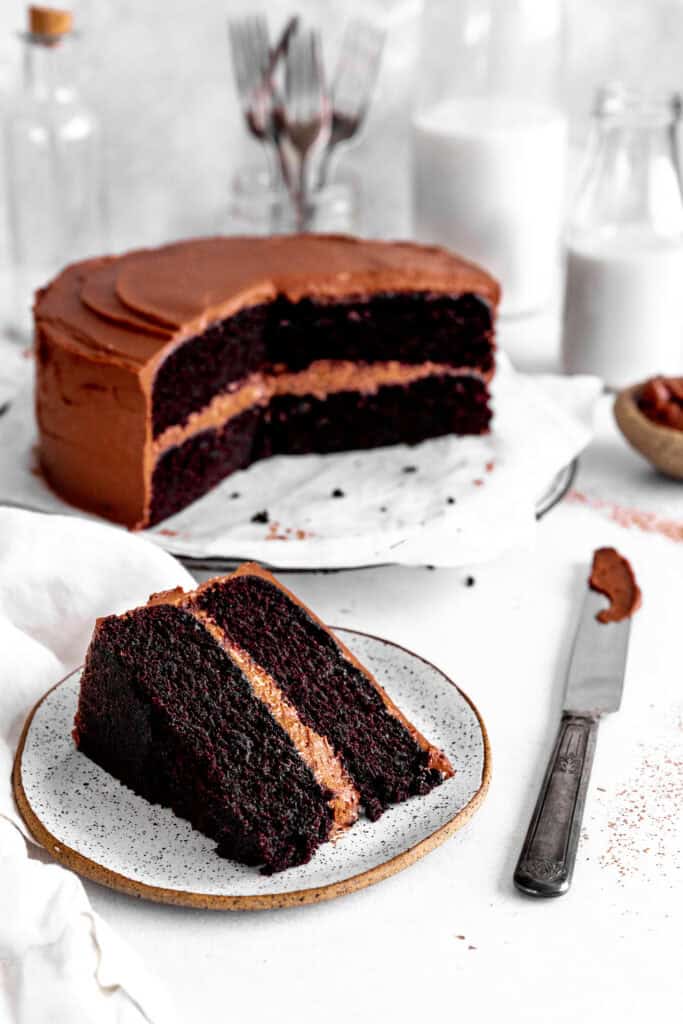
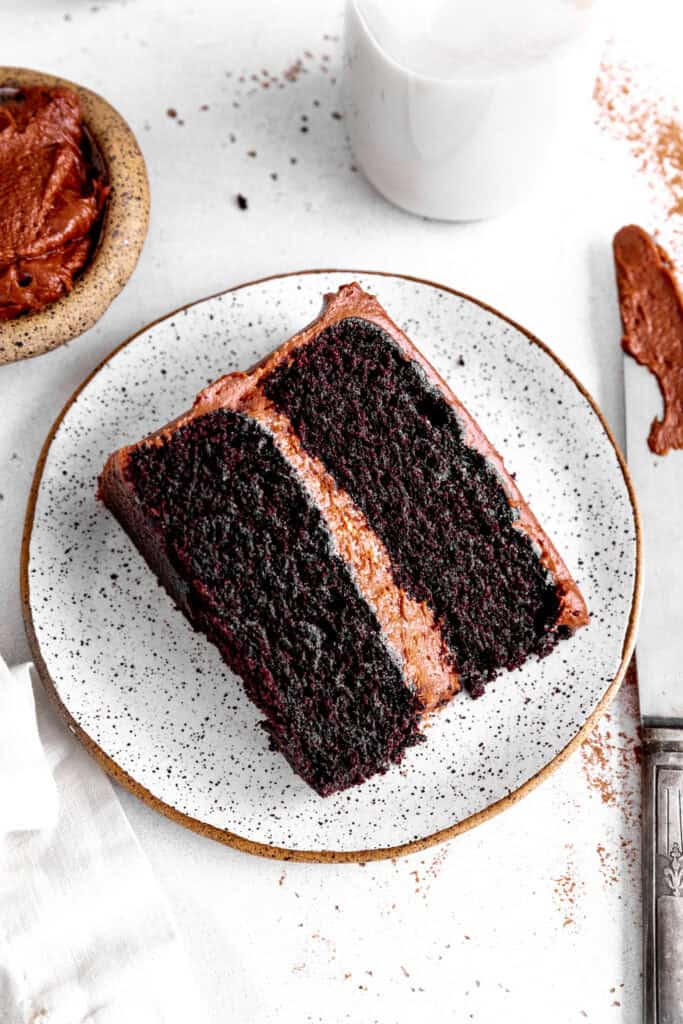
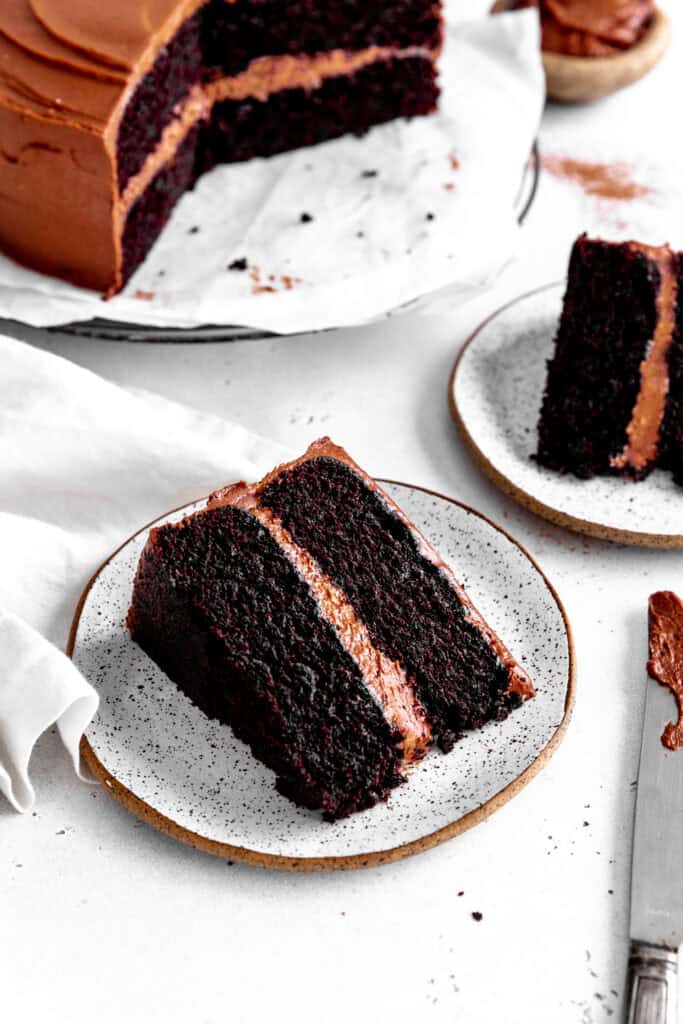
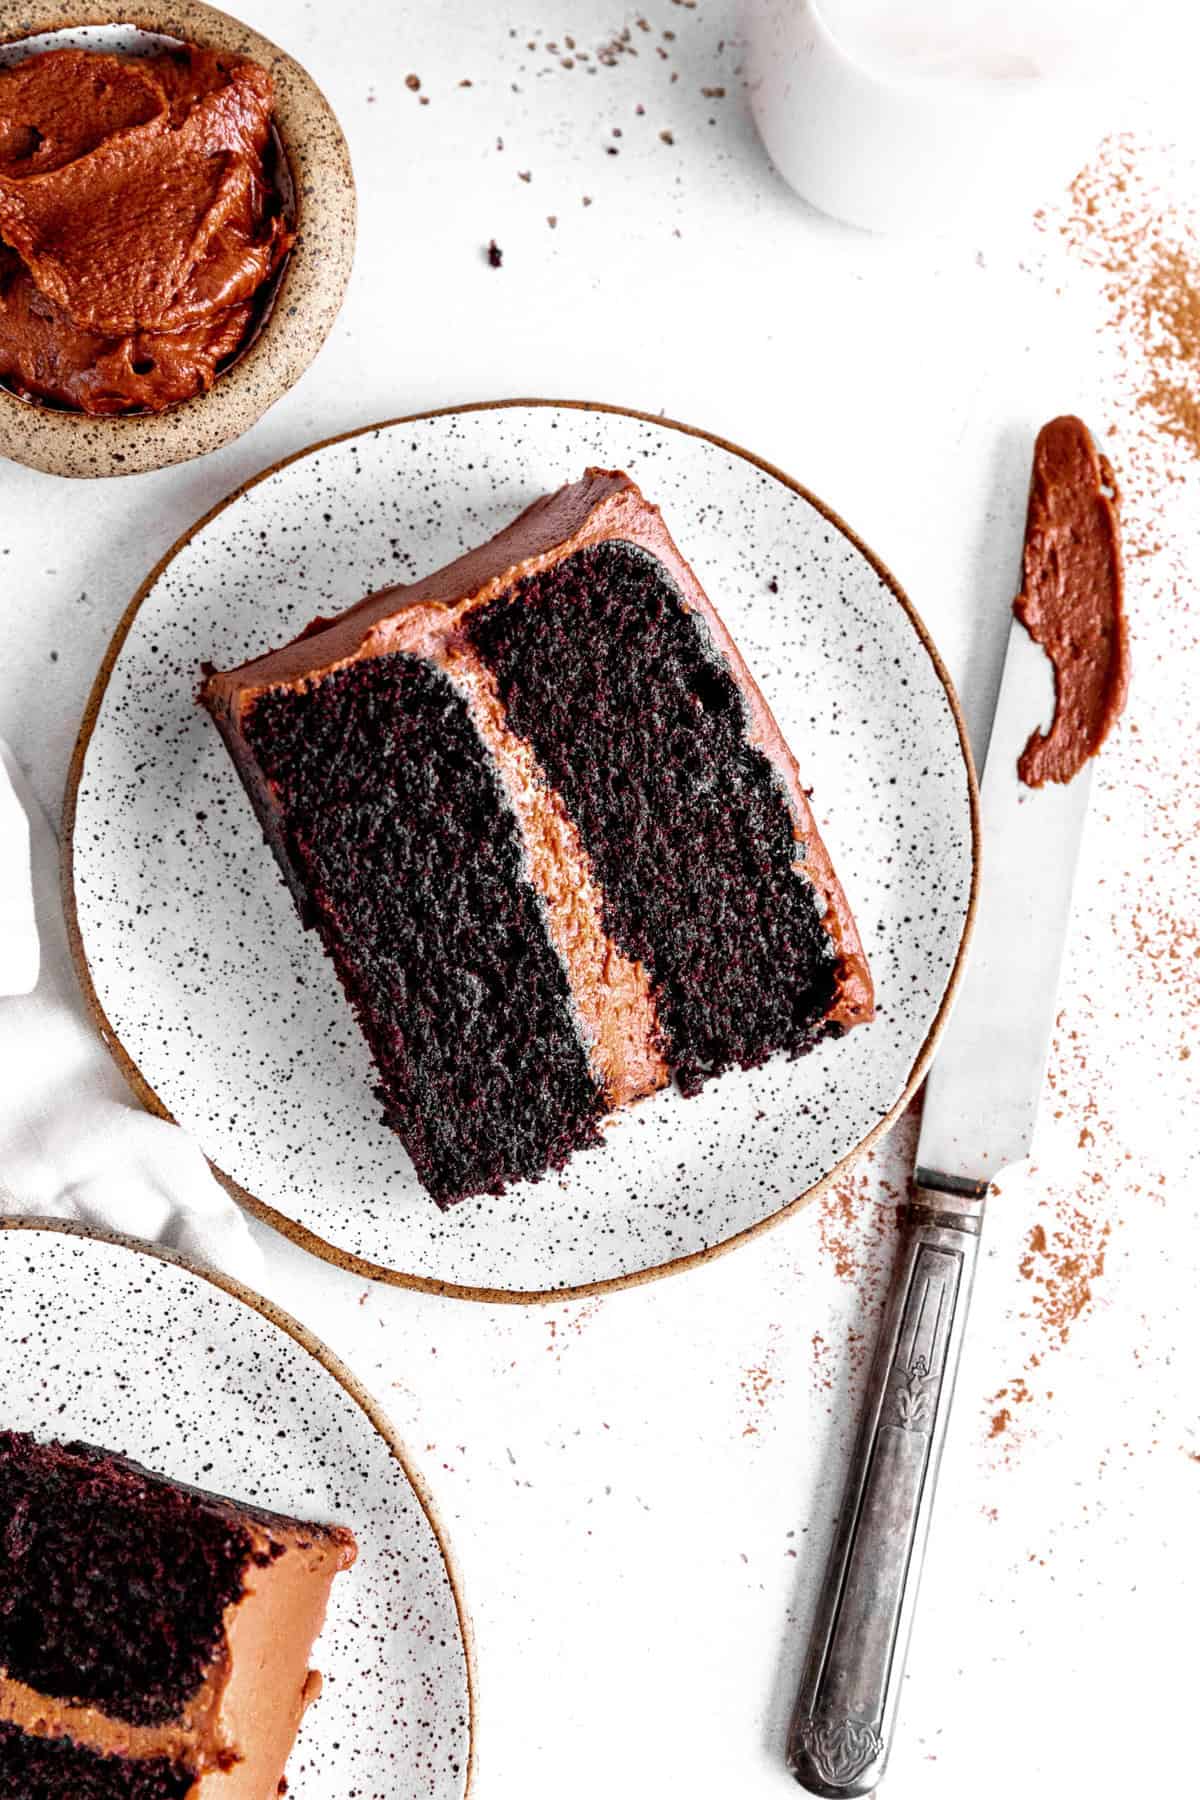
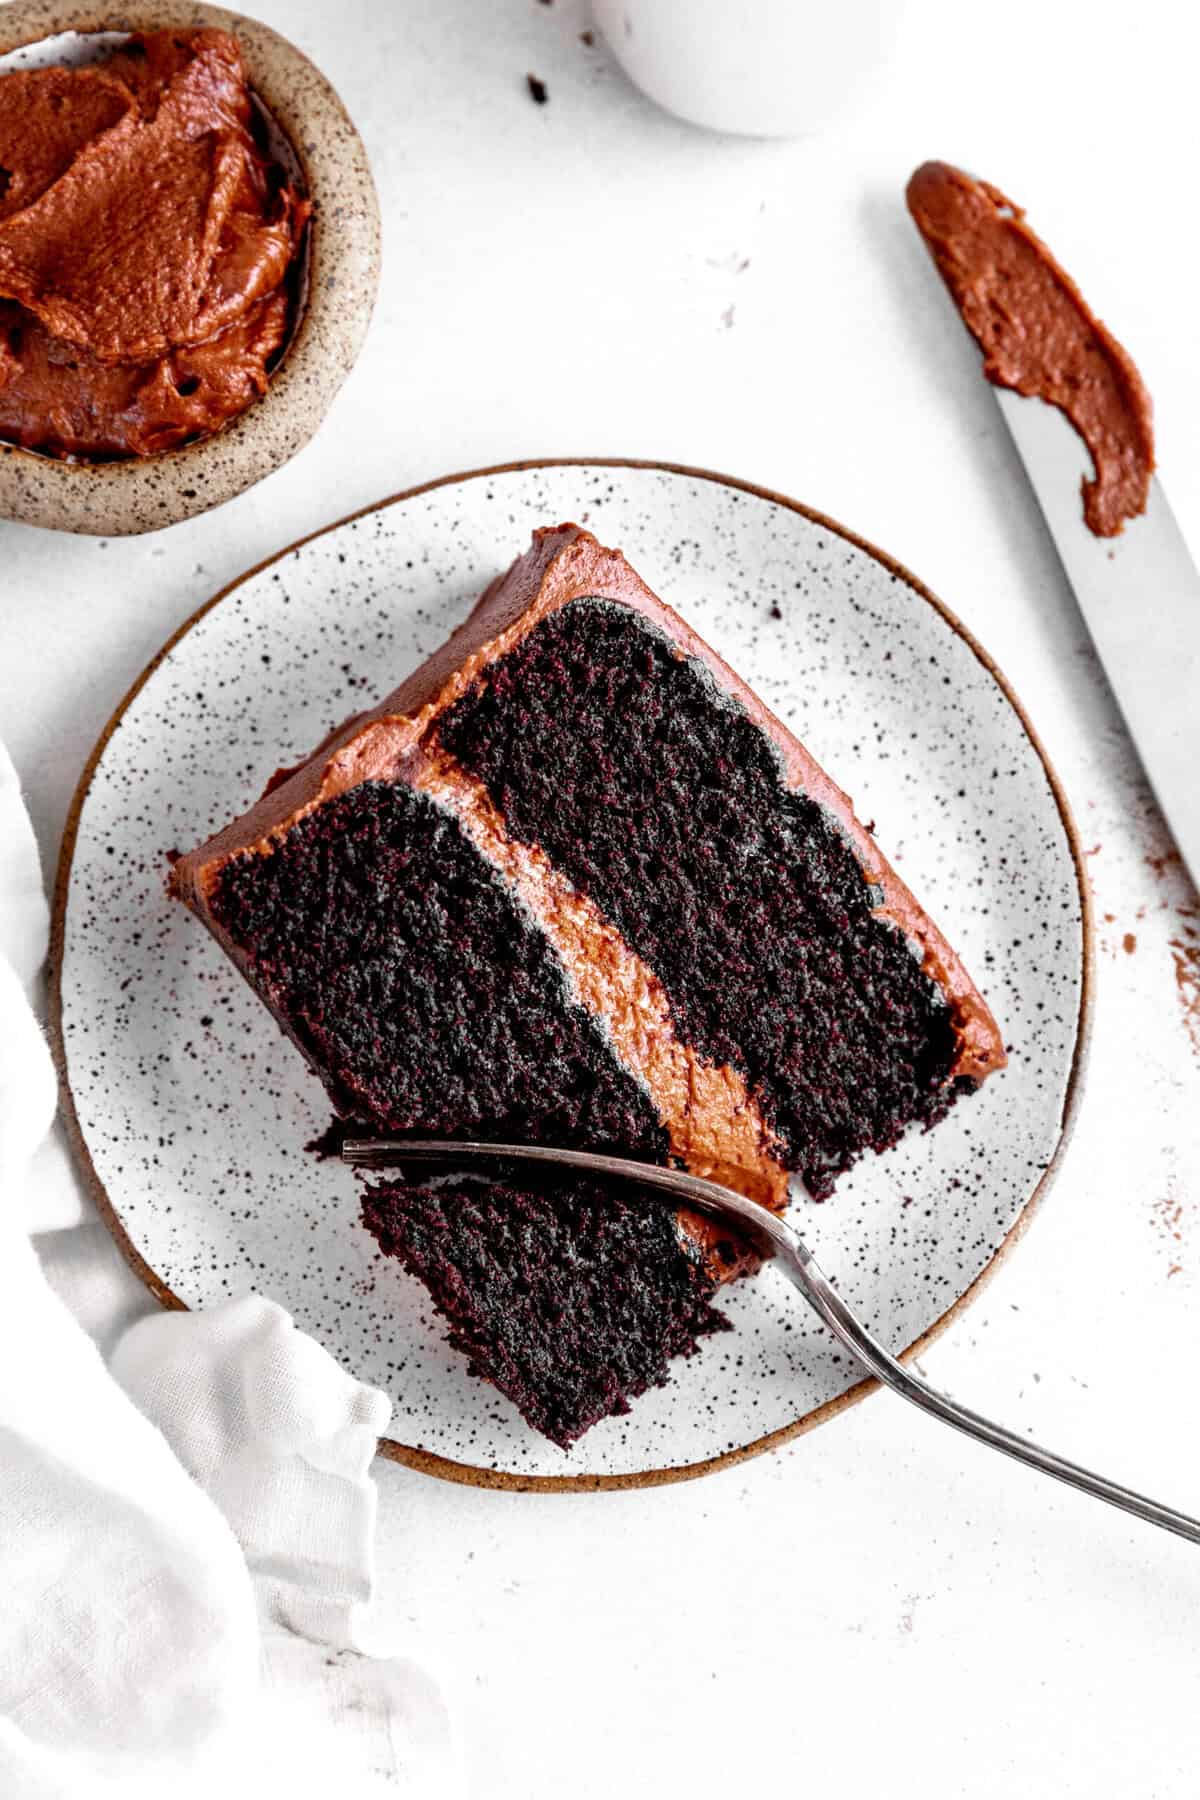
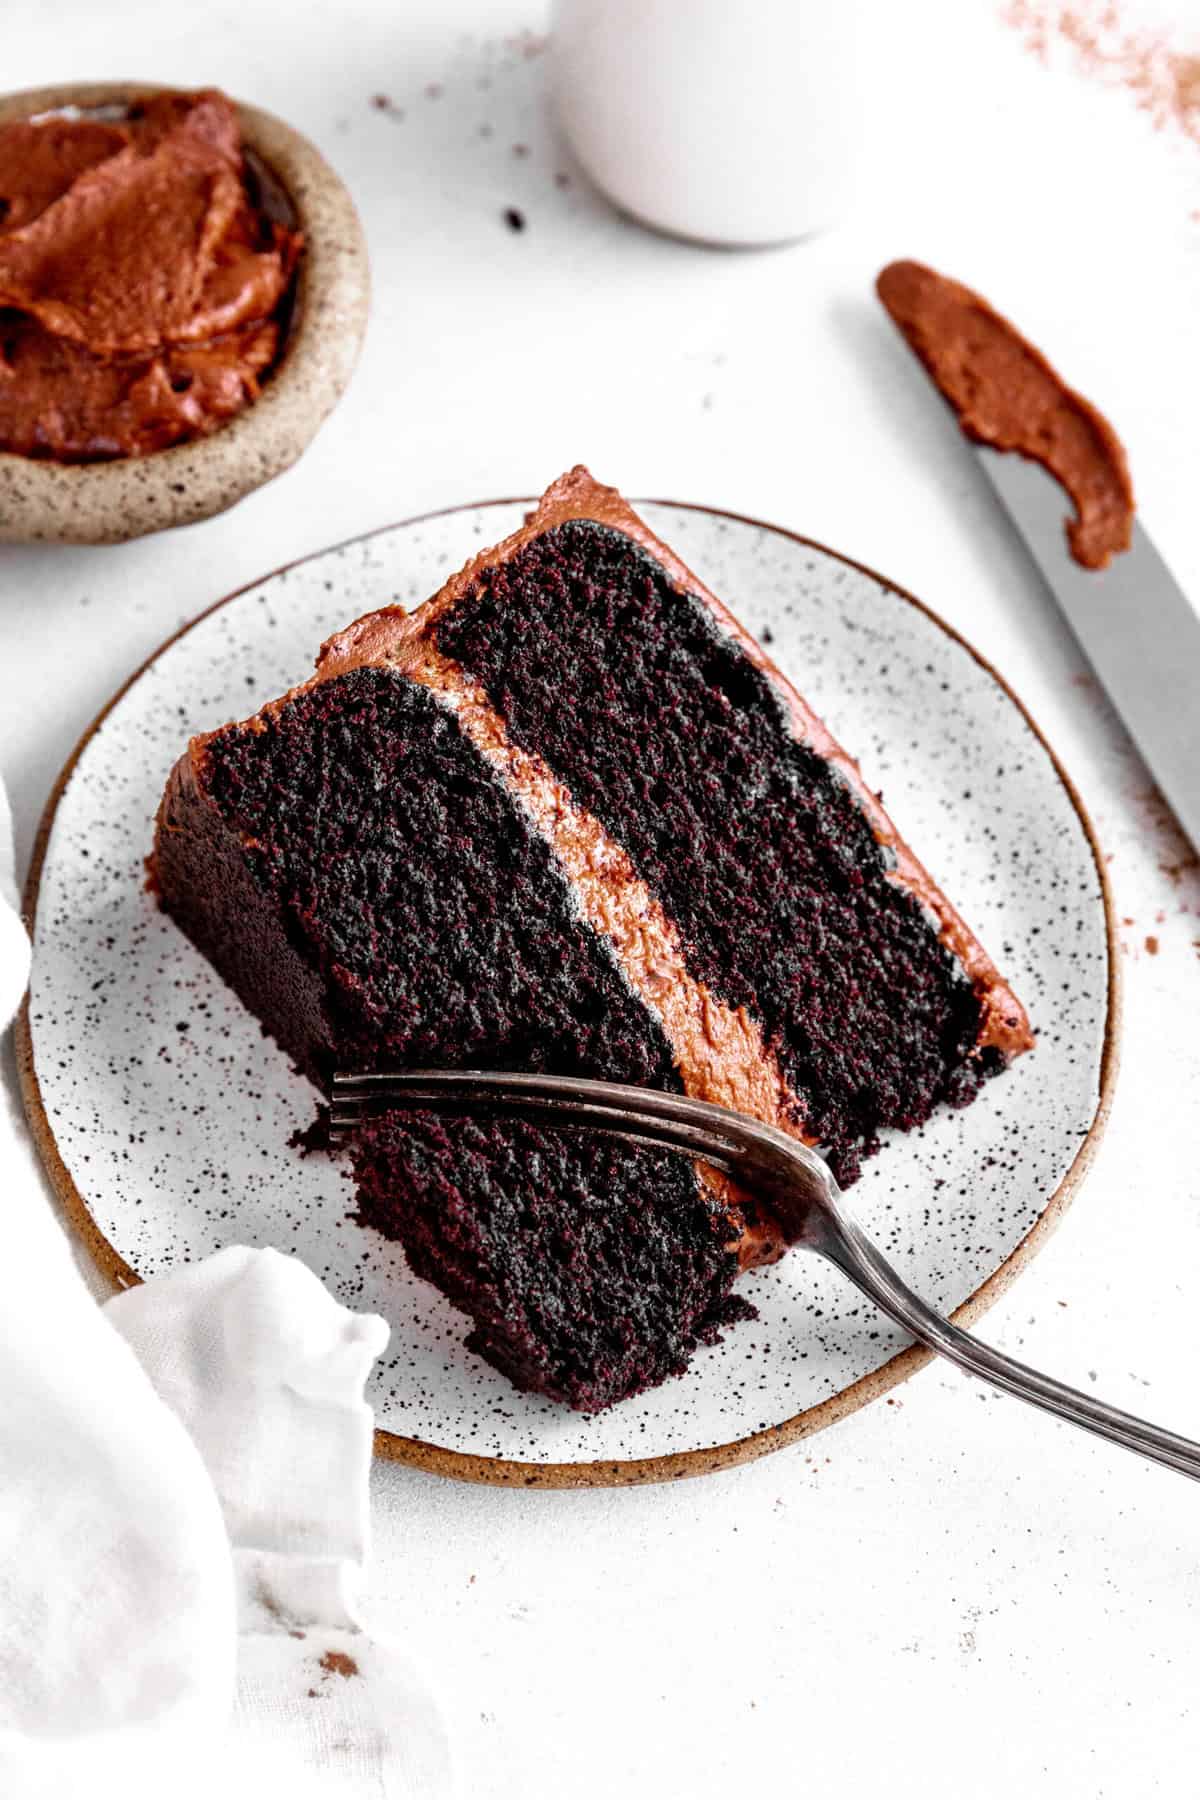
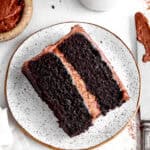
This incredibly moist, fudgy Vegan Chocolate Cake is the absolute best you will ever try. Rich chocolate frosting sandwiched between layers of decadent chocolate cake and made in only one bowl!? Absolute perfection. Let's learn how to make it!
Nothing beats chocolate cake, and this may very well be the greatest one of all time. This vegan chocolate cake is made using an incredibly simple recipe and easy to find ingredients.
Sweet, melt in your mouth cake layers slathered in fudgy frosting? Absolutely incredible.
Want to make cupcakes instead? Be sure to check out our vegan chocolate fudge cupcakes.
If you're a chocoholic like us you'll also want to look into our chocolate recipes. Thank us later!
Cake ingredients:
This combination of ingredients ensures a rich, moist, and perfectly balanced vegan chocolate cake:
- all-purpose flour: provides structure and stability, creating a tender yet sturdy cake.
- granulated sugar: sweetens the cake while helping retain moisture for a soft crumb.
- dutch-processed cocoa powder: gives a deep, rich chocolate flavor and a smooth texture.
- instant espresso powder: enhances the depth of chocolate flavor without making the cake taste like coffee.
- baking powder & baking soda: act as leavening agents to help the cake rise and create a fluffy texture.
- salt: balances sweetness and enhances the chocolate flavor.
- nondairy yogurt: acts as an egg replacer, adding moisture and binding the ingredients together.
- nondairy milk: adds moisture and helps create a smooth batter consistency.
- canola oil: provides richness and keeps the cake extra moist.
- vanilla extract: enhances the overall flavor and balances the deep chocolate notes.
Why this is the best chocolate cake ever:
- Ultra Moist & Fudgy Texture - Thanks to the combination of nondairy yogurt, oil, and nondairy milk, this cake stays incredibly soft, rich, and moist with every bite.
- Deep, Indulgent Chocolate Flavor - Dutch-processed cocoa powder and espresso powder work together to enhance the chocolate taste, making it intensely rich and satisfying.
- Fluffy & Perfectly Risen - A balance of baking powder and baking soda ensures the cake rises beautifully, creating a soft, airy crumb.
- Easy to Make with Simple Ingredients - No complicated techniques or hard-to-find ingredients-just pantry staples combined into a foolproof recipe!
- Completely Vegan & Dairy-Free - No eggs, butter, or dairy needed! It's the perfect cake for anyone with dietary restrictions without sacrificing taste or texture.
Steps to make the perfect chocolate cake (with pictures!):
Please see the recipe card at the bottom of the page for full instructions and ingredient measurements.
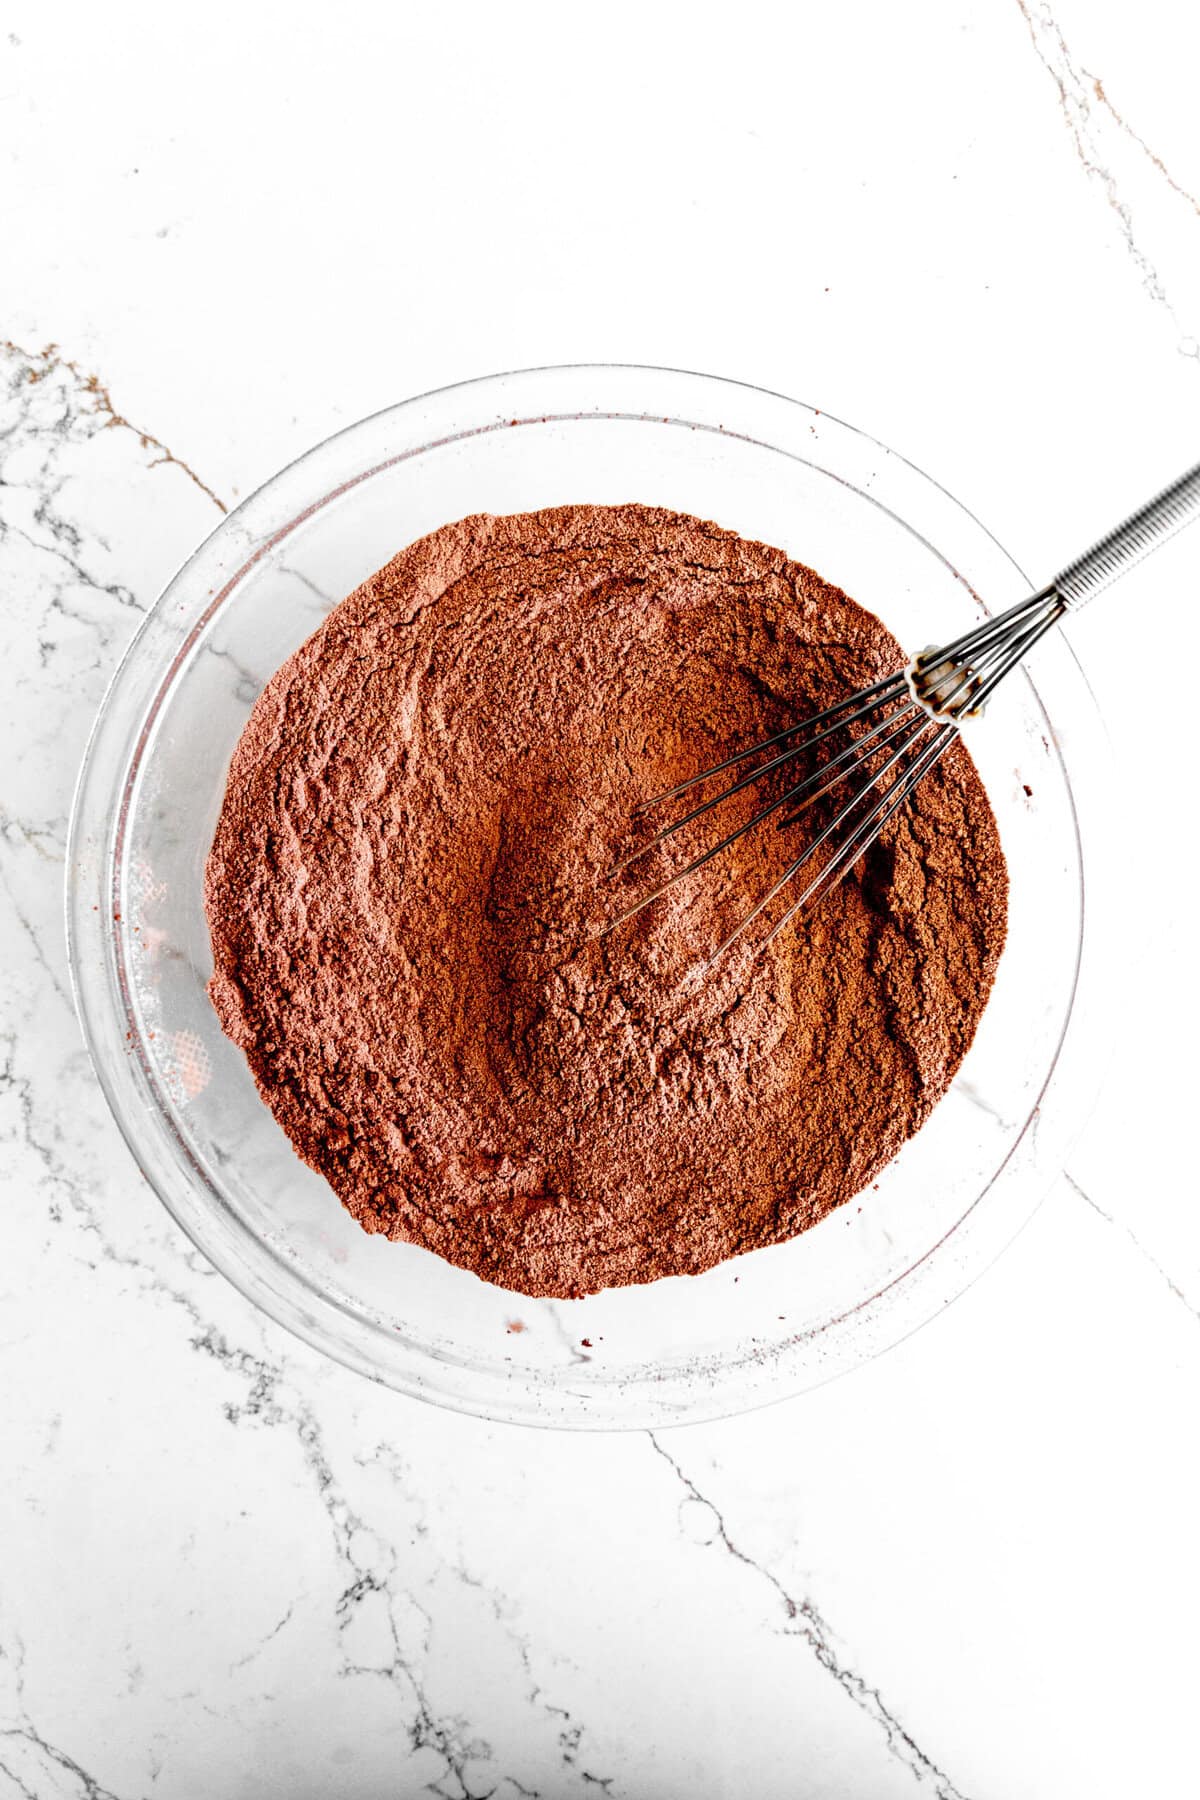
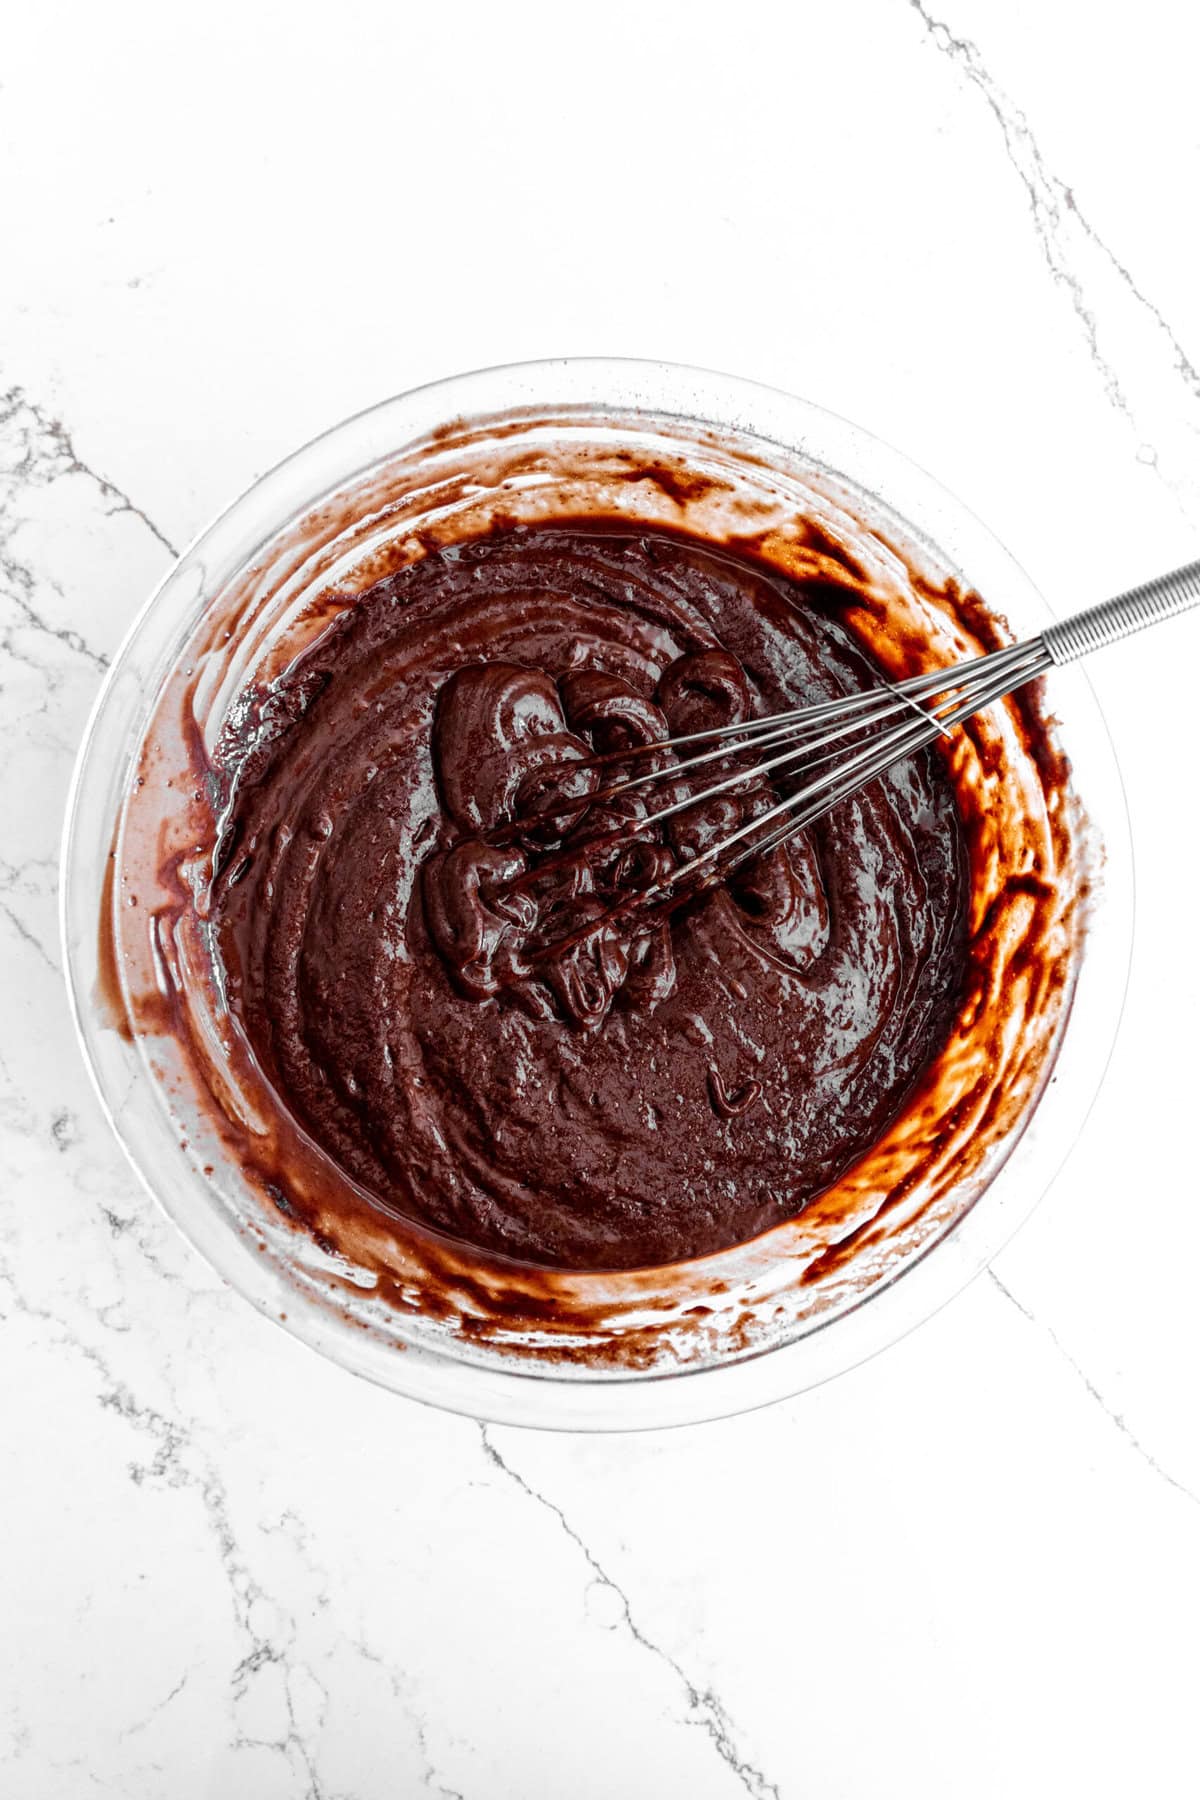
Begin by whisking together all of the dry cake ingredients until evenly distributed. Add the wet ingredients to the bowl and mix until just combined.
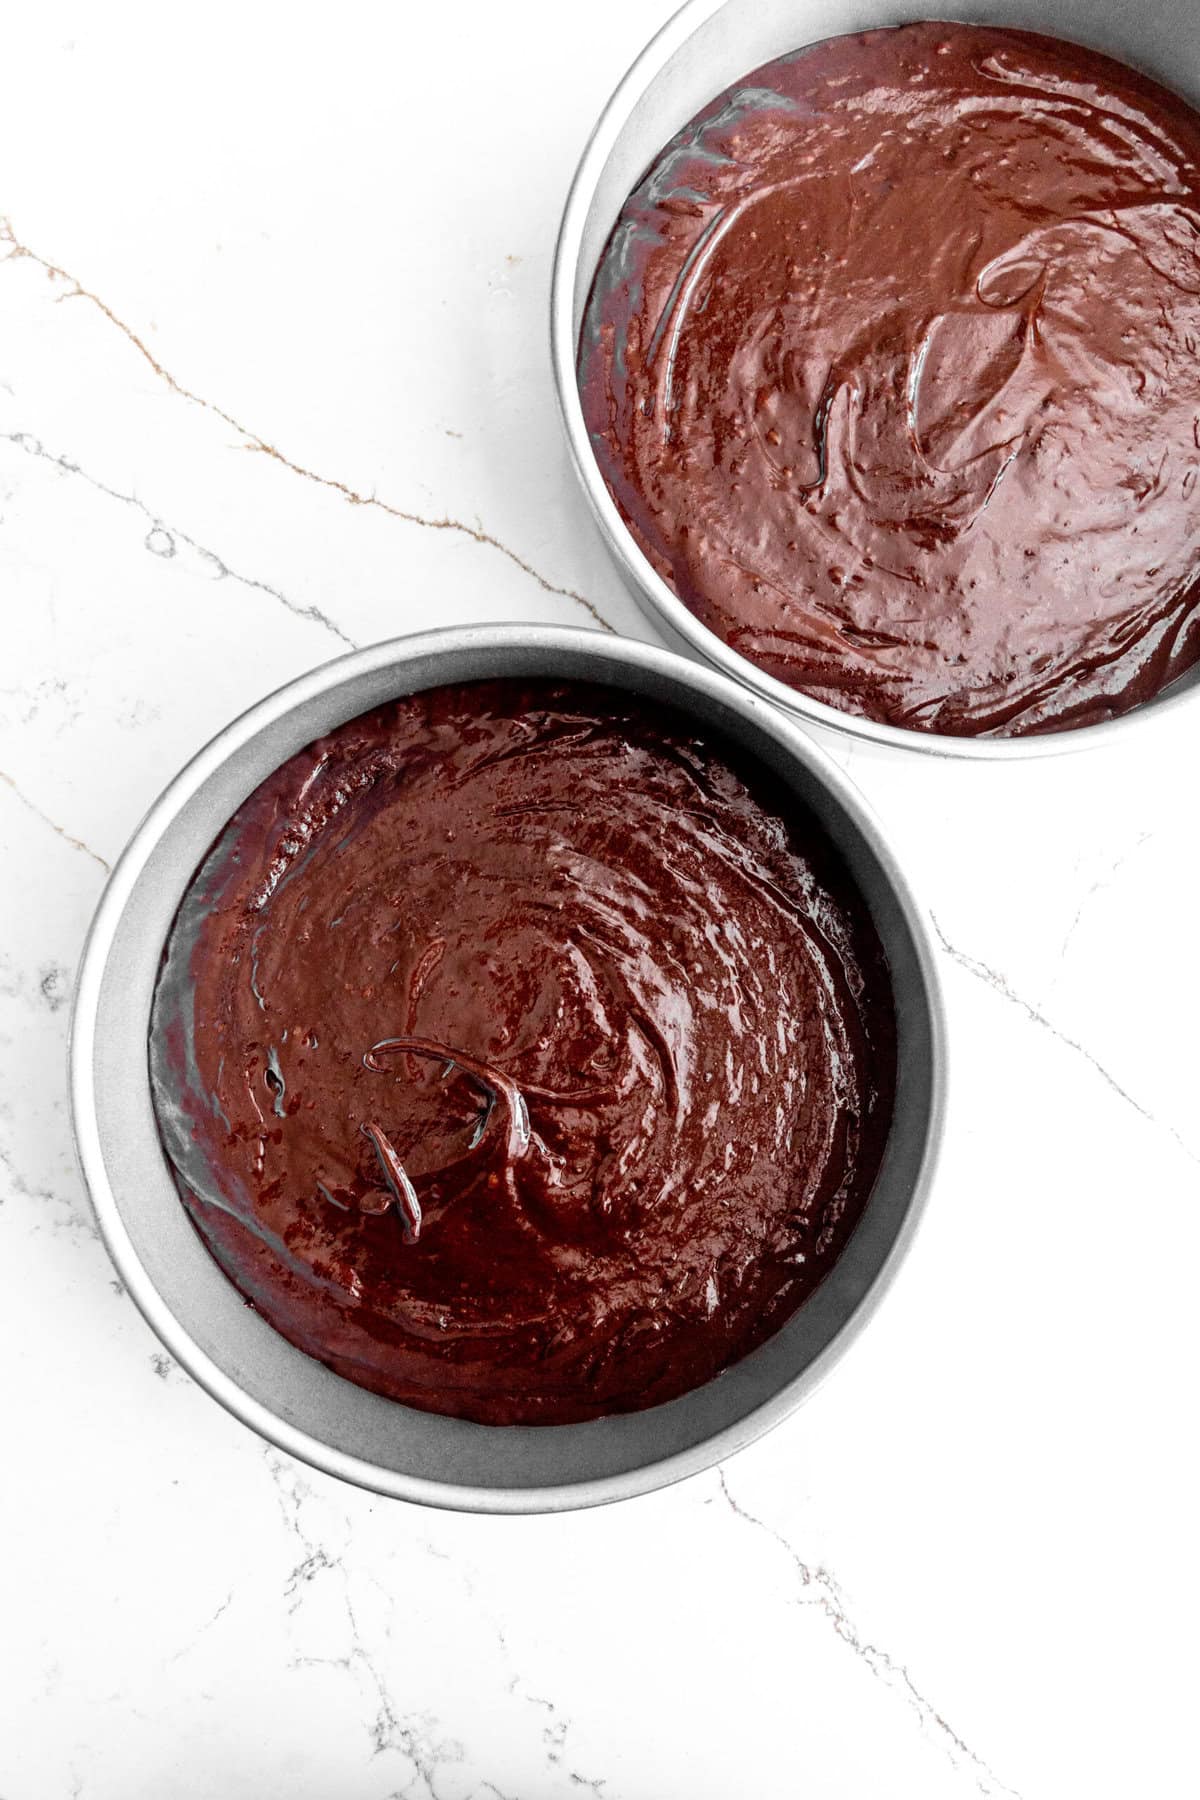
Divide the cake batter between 2 8 inch baking pans or 3 6 inch baking pans lined with parchment paper.
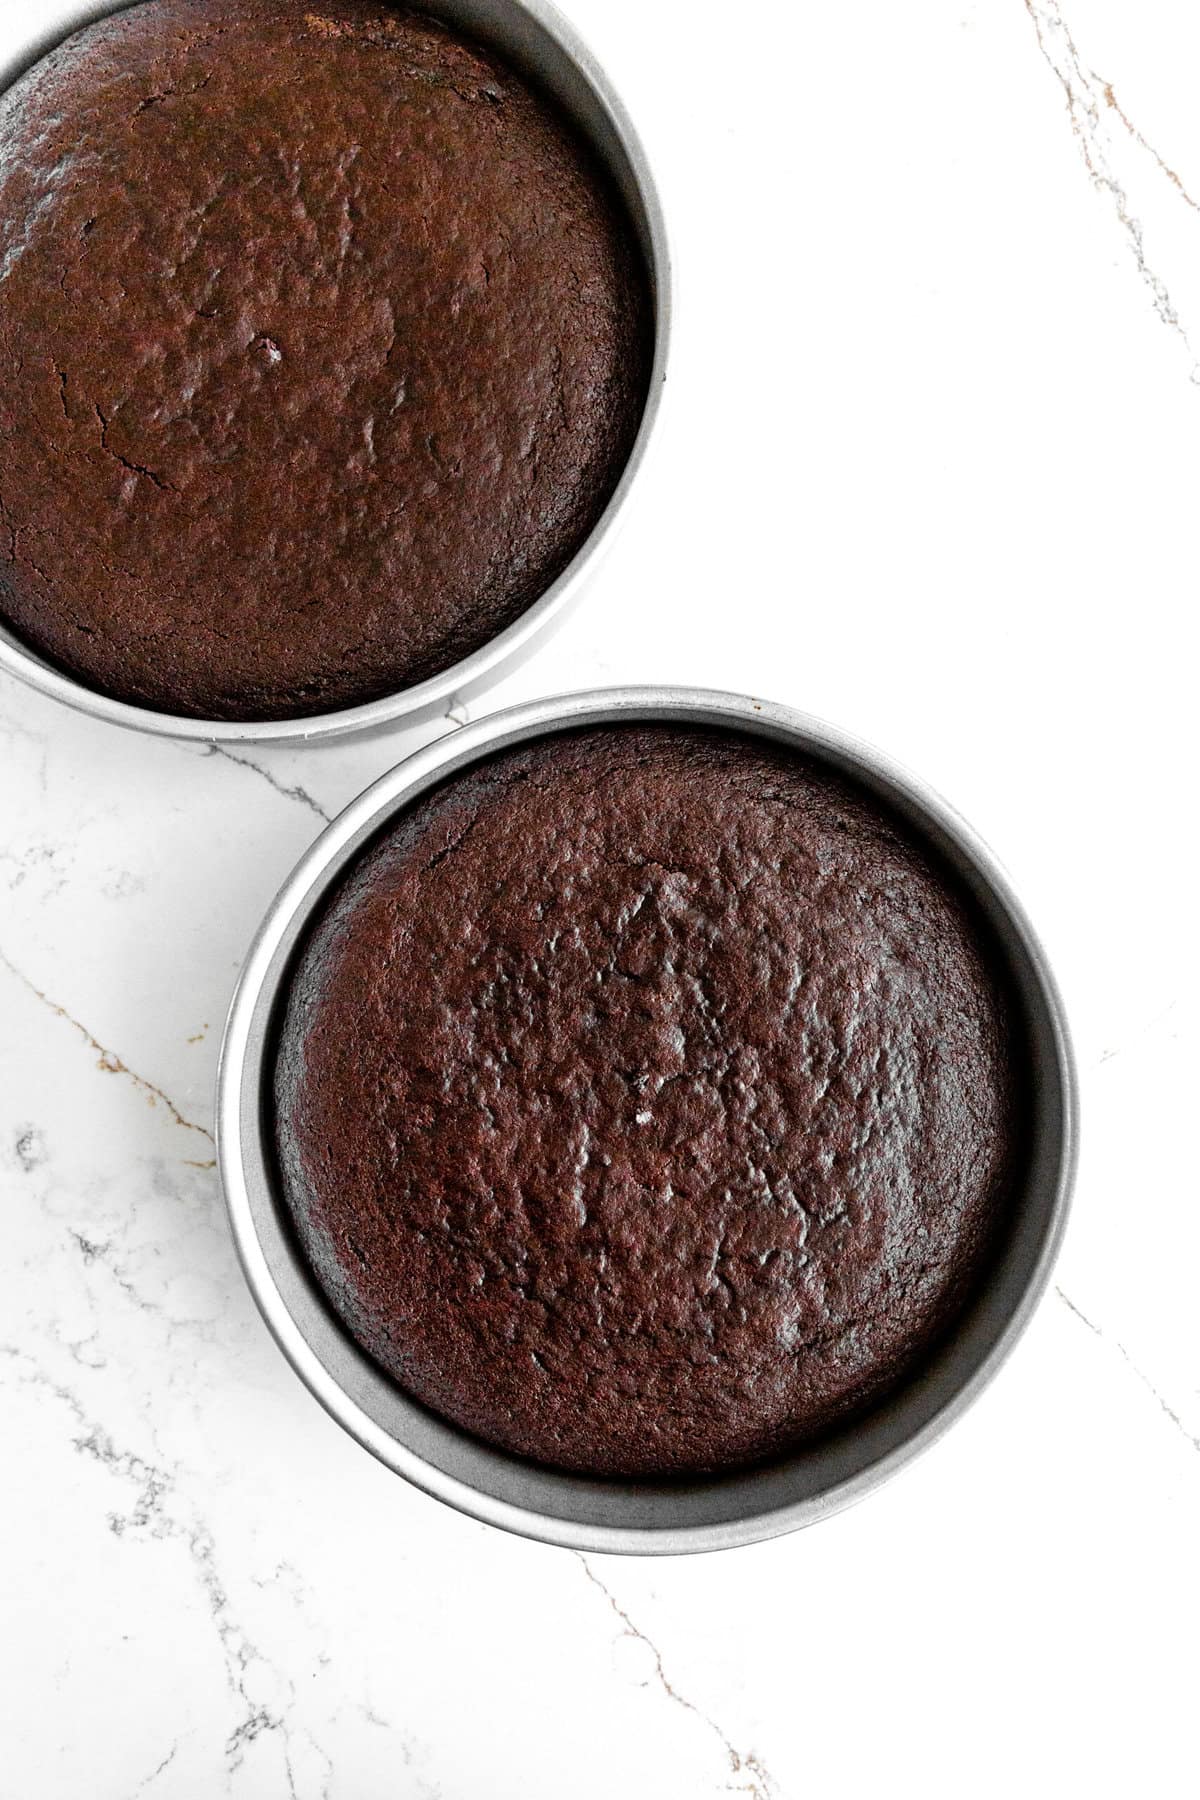
Bake on center rack of an oven that has been preheated to 350 degrees F (175 C) for 30-34 minutes.
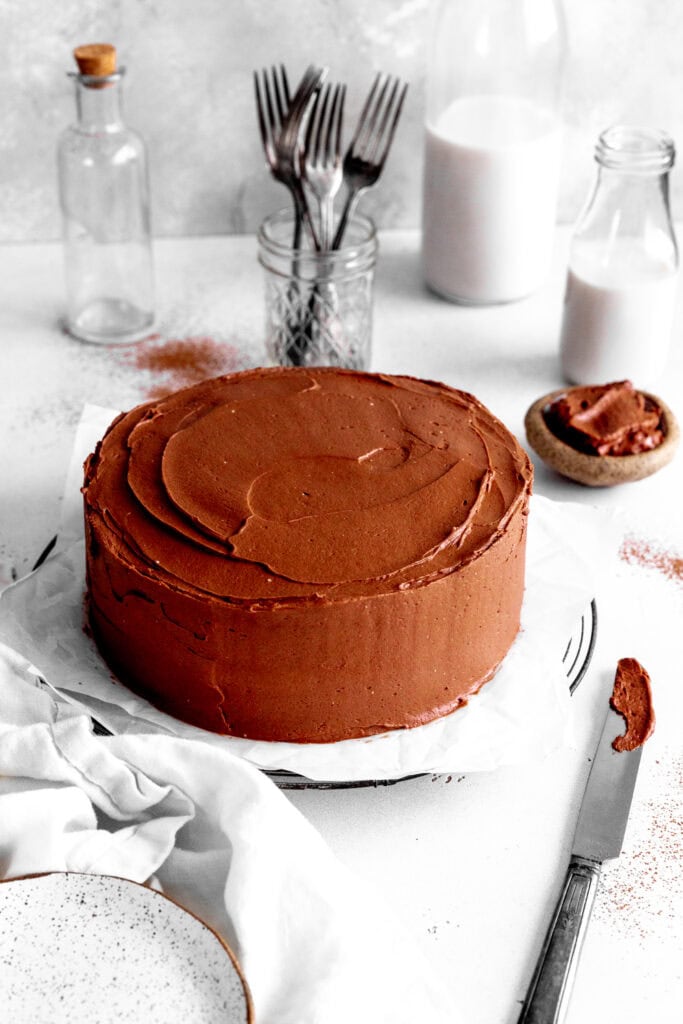
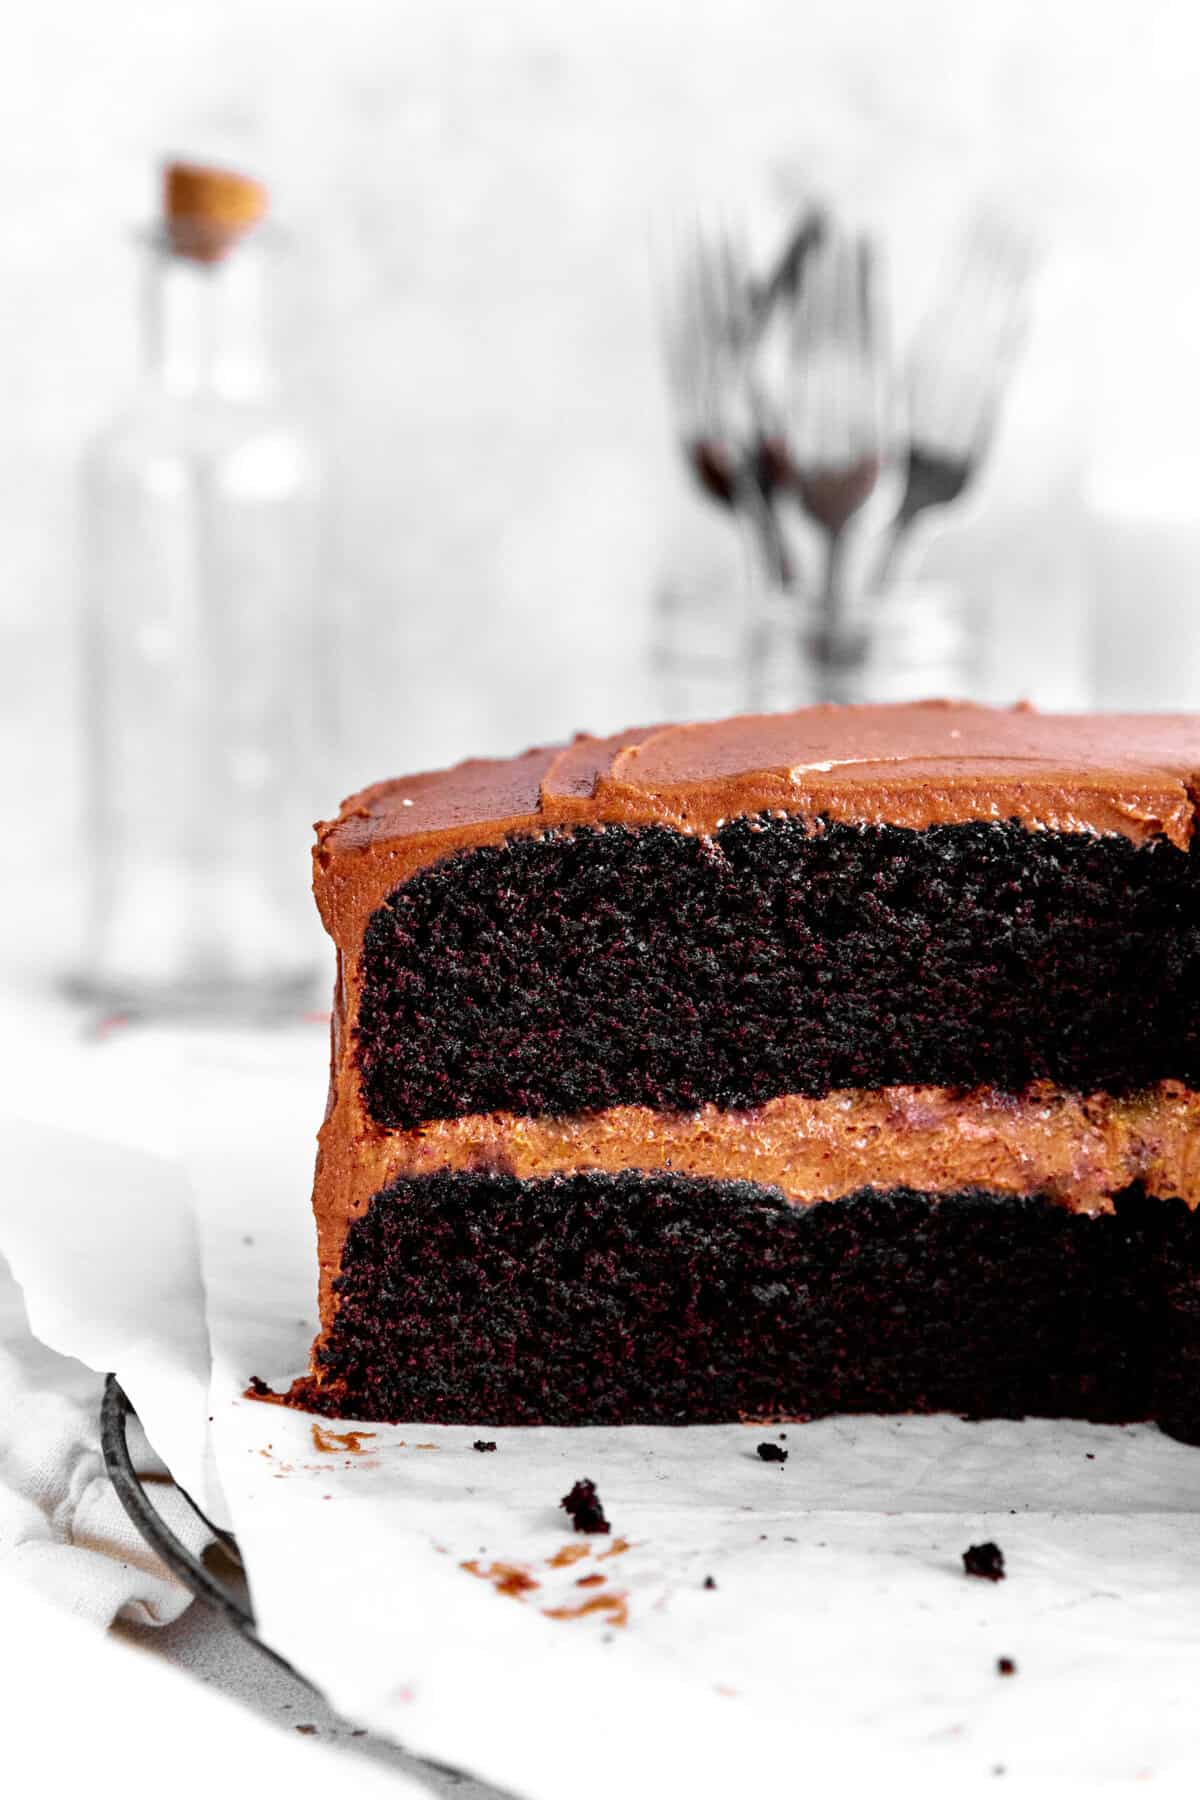
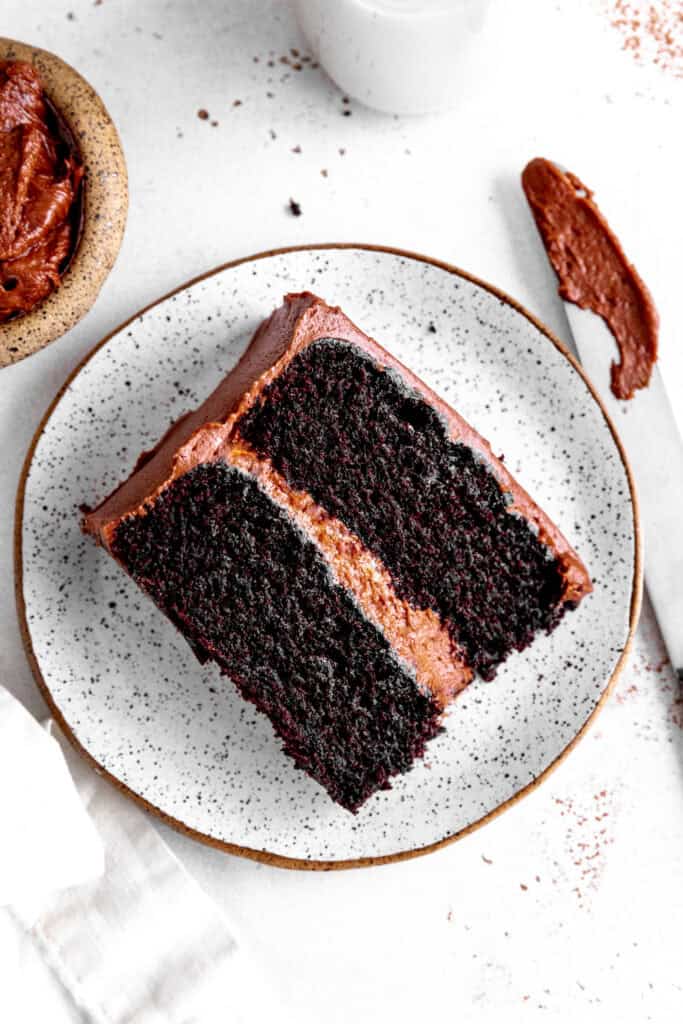
Stack and spread cooled cake layers with the prepared chocolate frosting. Do not slice cake until you are ready to serve.
The fudgiest chocolate buttercream frosting:
This is the smoothest, creamiest chocolate frosting of all time - and it's easy to make!
The secret is a combination of shortening and vegan butter. This will give your chocolate frosting the stability and flavor you're looking for in a layer cake.
Here are the ingredients you'll need:
- non-hydrogenated shortening: helps create a stable, creamy frosting with a smooth texture.
- vegan butter: adds richness and helps create a classic buttercream flavor.
- cocoa powder: provides a deep chocolate flavor in the frosting.
- powdered sugar: sweetens the frosting and gives it a fluffy, airy consistency.
- salt: balances the sweetness and enhances the chocolate flavor.
- nondairy milk: adjusts the frosting's consistency, making it smooth and spreadable.
- vanilla extract: adds depth to the frosting and complements the chocolate flavor.
Top cake tips & tricks:
- Use High-Quality Cocoa Powder - Dutch-processed cocoa powder gives the cake a deep, rich chocolate flavor. Don't skimp on quality!
- Sift Your Dry Ingredients - This helps prevent lumps and ensures a smooth, even batter for a soft and fluffy cake.
- Don't Skip the Espresso Powder - It won't make the cake taste like coffee, but it enhances the chocolate flavor for a deeper, more intense taste.
- Measure Flour Correctly - Spoon the flour into the measuring cup and level it off with a knife. Packing it in can lead to a dense cake.
- Don't Over-mix the Batter - Stir until just combined. Over-mixing can lead to a tough cake by overdeveloping the gluten.
- Check for Doneness the Right Way - Insert a toothpick into the center. If it comes out with a few moist crumbs, the cake is done. If it's wet, bake a little longer.
- Let the Cake Cool Completely Before Frosting - A warm cake will cause the frosting to melt, so be patient!
- Make the Frosting Extra Creamy - Beat the frosting ingredients for a few minutes to create a fluffy, smooth texture. If it's too thick, add a splash of nondairy milk.
What makes this cake so moist?
These are the ingredients and methods that make this cake so ridiculously moist:
- Nondairy Yogurt - Acts as an egg replacement, adding moisture and tenderness while also helping with structure.
- Canola Oil - Oil-based cakes tend to be more moist than butter-based ones because oil stays liquid at room temperature, keeping the cake soft.
- Nondairy Milk - Provides additional moisture and prevents the cake from being dry or crumbly.
- Sifted Flour - Ensures the flour is evenly distributed and prevents overpacking, which can lead to a dense, dry cake.
- Perfect Balance of Baking Powder & Baking Soda - Creates lift while preventing the cake from becoming too heavy or dry.
- Dutch-Processed Cocoa Powder - Absorbs liquid without making the cake dry, thanks to its fine texture.
- Proper Mixing - Over-mixing can make a cake tough, while under-mixing can leave dry pockets. Mixing just until combined ensures the best texture.
- Resting Time Before Baking - Letting the batter sit for a few minutes before baking allows the ingredients to fully hydrate and results in a more moist cake.
- Proper Baking Time & Temperature - Overbaking dries out cakes, so checking for doneness with a toothpick ensures it stays perfectly moist.
- Well-Sealed Storage - If stored properly in an airtight container, the cake retains its moisture longer and stays soft for days.
The combination of yogurt, oil, milk, and cocoa powder works together to create a super fudgy, rich, and moist vegan chocolate cake that melts in your mouth!
Frequently asked questions:
Yes! You can substitute the all-purpose flour with a high-quality 1:1 gluten-free flour blend. Just ensure it contains xanthan gum or a binding agent for the best texture.
No, but it enhances the chocolate flavor without making the cake taste like coffee.
Yes! You can use vegetable oil, melted coconut oil, or even avocado oil. Just avoid oils with a strong flavor, like olive oil, as they may alter the taste of the cake.
Measure your flour correctly using the spoon-and-level method, don't over-bake and store the cake in an airtight container to retain moisture.
Make sure your vegan butter and shortening are softened before mixing, sift the cocoa powder and powdered sugar to prevent lumps, and add the nondairy milk gradually until you reach the desired consistency.
Yes! You can bake the cake layers a day in advance and store them wrapped in plastic wrap at room temperature. The frosting can also be made ahead and stored in the fridge, then whipped before frosting.
Recipe variations:
Here are a few approved recipe variations to give your vegan chocolate cake an extra flavor kick!
- Chocolate Peanut Butter Cake: Swap peanut butter frosting for chocolate frosting for awesome peanut butter cup flavor.
- Mocha Chocolate Cake: Increase the instant espresso powder to 1 tablespoon for a stronger coffee flavor. Use coffee instead of nondairy milk for an extra mocha kick.
- Chocolate Raspberry Cake: Spread a layer of raspberry jam between cake layers before frosting.
- Spiced Chocolate Cake: Add 1 teaspoon of cinnamon and ¼ teaspoon of cayenne pepper to the dry ingredients for a Mexican chocolate-inspired cake. Top with a dusting of cocoa powder and cinnamon for extra flavor.
- Mint Chocolate Cake: Add ½ teaspoon of peppermint extract to the batter. Decorate with crushed peppermint candies or mint leaves.
- Chocolate Orange Cake: Add 1 tablespoon of orange zest and replace half of the vanilla extract with orange extract. Garnish with candied orange slices for a gourmet finish.
- Nutty Chocolate Cake: Stir in ¾ cup of chopped walnuts, pecans, or almonds for added crunch. Top with a chocolate-nut ganache for extra richness.
- Gluten-Free Chocolate Cake: Replace the all-purpose flour with a 1:1 gluten-free flour blend. Add an extra tablespoon of nondairy yogurt to keep it moist.
How to store leftover cake:
The best way to store your prepared vegan chocolate cake is in an airtight container at room temperature. If your cake is too tall to fit under your cake stand cover, turn a large pot over on top of it instead. Your cake will keep for 3-4 days like this.
Unfrosted cake layers can be wrapped tightly in plastic wrap and tinfoil and frozen for up to one month.
If you make this recipe please tag @censoredbaker on Instagram.
PrintVegan Chocolate Cake
The absolute best vegan chocolate cake recipe - rich chocolate frosting sandwiched between layers of moist chocolate cake. Quick, easy and totally decadent.
- Prep Time: 30 minutes
- Bake Time: 30 minutes
- Total Time: 1 hour
- Yield: 12 servings 1x
- Category: Cakes and Cupcakes
- Method: Bake
- Cuisine: American
- Diet: Vegan
Ingredients
For the Cake
2 cups all purpose flour, sifted
1 ¾ cup granulated sugar
¾ cup dutch processed cocoa powder, sifted
2 teaspoons instant espresso powder
2 teaspoons baking powder
1 teaspoon baking soda
1 teaspoon salt
1 cup nondairy yogurt (unflavored & unsweetened)
¾ cup nondairy milk
¾ cup canola oil
2 teaspoons vanilla extract
For the Frosting
½ cup non-hydrogenated shortening
½ cup vegan butter, softened
½ cup cocoa powder, sifted
3 cups powdered sugar
pinch of salt
3 tablespoons nondairy milk
1 teaspoon vanilla extract
Instructions
- Prep: Preheat oven to 350 degrees F (175 C) and lightly grease and line 3 6-inch or 2 8-inch round baking pans with parchment paper. Set aside.
- Mix: In a large bowl whisk together the flour, granulated sugar, cocoa powder, espresso powder, baking powder, baking soda and salt. Add the yogurt, milk, oil and vanilla extract to the bowl. Whisk until just combined. Do not over-mix.
- Bake: Evenly distribute the cake batter between prepared cake pans. Place pans on center rack of preheated oven and bake for 30-34 minutes or until toothpick inserted into the center of cakes comes out clean with only a few crumbs clinging to it. Allow cakes to cool in pans for 30 minutes before turning them out onto a wire rack to cool completely.
- Frosting: While cakes are cooling, prepare the frosting. Combine shortening and softened vegan butter in a large bowl and beat with an electric hand mixer or stand mixer until completely smooth. Sift in the cocoa powder and powdered sugar. Add salt, nondairy milk and vanilla to the bowl. Beat until frosting comes together.
- Assemble: Set a cake layer on a cake plate or stand and spread a layer of chocolate frosting over the top. Top with another cake layer and repeat if you are making a three layer cake. Spread remaining frosting over the top and sides of cake. Do not slice until you are ready to serve.
Notes
*Prepared cake will keep in an airtight container at room temperature for 3-4 days. Unfrosted cake layers can be frozen for up to 1 month.
*While leveling your cake layers is not necessary, I would recommend it if making a 3 layer cake. This can be done using a serrated knife and a cake turntable. This video is a good guide.
*If you'd like to get ahead, cake layers can be made the day before you intend to frost and serve. Prepare and cool cakes as directed in recipe then wrap each individual layer in plastic wrap. Place in the refrigerator to chill overnight. This will help with leveling and frosting.
Holy cow! This was a really fun one to make for my vegan sister’s birthday.
Thanks Theodore! So glad you liked it!